The SP-GeoMap Field
The SP-GeoMap Field - Configuration of the SP-GeoMap Field
Configuration of the SP-GeoMap Field
Refers to version: 3.4 (2.2)
The SobiPro SP-GeoMap field and the Basic SP-GeoMap field extend the types of possible fields for SobiPro with a field type for showing the location of an entry on a Google map. While editing an entry, they create coordinates based on the geo-location of the current IP address of the author, or of the entered address. Thereupon the entry will get a map with a marker on its location in the details view.
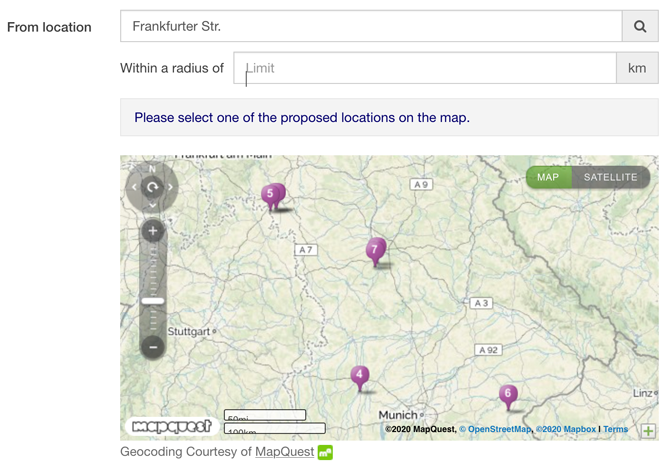
The SP-GeoMap field (not the Basic SP-GeoMap field) gives you also the possibility to do a proximity search to find entries within the proximity of a given location. This is a radius search without the limitation to a radius, but sorted by distance to the given location.
The SP-GeoMap field and the Basic SP-GeoMap field have a few settings you need to take care of to have the fields work properly. This description is for both fields if not stated otherwise. If referring to version numbers, the version of the Basic SP-GeoMap field is given in brackets.
In the entry form the geographical coordinates for an entry are determined either by automatic geo-location depending on the entered address or by a browser's detection of the location. In both cases the location is shown on a map with a marker. This maker can be moved on the map by dragging. It is wise to have the address field above the map to let the user enter his address data first.
The GeoMap field stores the geographical coordinates in the database for later use in the details view of an entry. So no geo-location is done in the details view! If you already have entries in your directory before adding a GeoMap field, or you want to import entries to it and get them geo-coded, please check how to Batch adding geomap coordinates to existing or new entries.
Edit or add a GeoMap Field
You can add a SP-GeoMap field to one of your sections by navigating to SobiPro Control Panel and clicking on a section name from the sections list, or by selecting the section from the Sections drop-down button. Once the section opens, select the Section Configuration from the menu on the left and then click on Fields Manager.
To add a new SP-GeoMap field, click the Add Field button and select from the drop-down list on the top right.
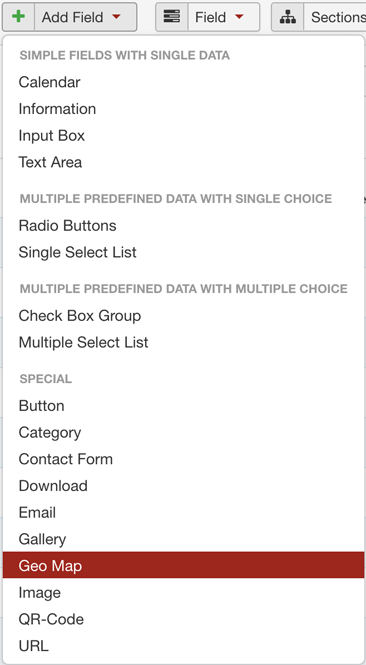
To edit an existing SP-GeoMap field, just find that field in the list of existing fields and click on its name.
The SP-GeoMap field has several settings which are divided into four tabs. The first tab, General Field Settings, lets you set-up the general field settings, the second tab, Entry Input Field Settings, lets you set-up the settings used for the entry form in front-end. The third tab, Entry View Field Settings, lets you manage the behaviour of the field in the views (listings or details views) on front-end. The fourth tab, Search Field Settings, let you set-up the behaviour of the field in SobiPro's search form. The latter is available only for the full version of the GeoMap field as it contains only the parameters for the proximity search.
General Field Settings
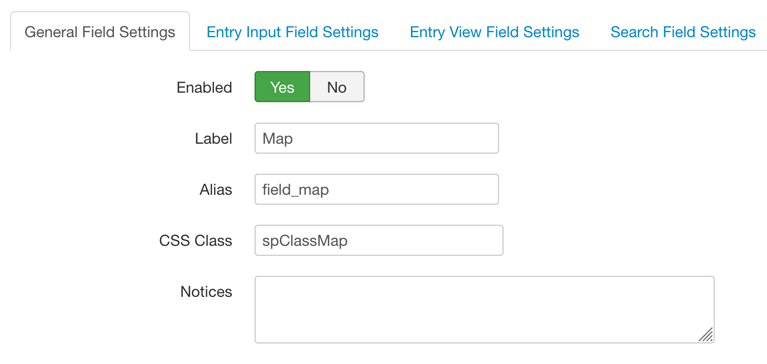
- Enabled
- Yes or No. Whether the field is enabled or not. As long as you have a field set to disabled, it won't be shown somewhere on front-end.
- Label
- Specify a label for this field. A label is shown on front-end if set so.
- Alias
- This is the name of the field used in the template. If you do not enter a name for the field, SobiPro will create one for you automatically on save, generated from the label. A field alias has to start with field_. In case you haven't entered it, SobiPro will add it for you. The field alias can be changed, but must be unique. Meaning you can't have two GeoMap fields in the same section named field_map or SobiPro will rename the alias to field_map_2 or similar.
If you have installed a SobiPro template which also created some fields for you, it is not wise to change the alias of a field as the template will probably access the field directly by its field name (alias). Changing it will let your template fail on front-end!
- Suffix
- Text entered here will be added immediately after the field data in the front-end views and after the input element in the entry form (add-on append).
- CSS Class
- Allows to add a CSS class that will be added to the output in the template. This class is added to the output of all views with that field.
It is pre-set tospClassMap. It is not wise to change or remove it as it could be used by one of the SobiPro templates to style the output of that field. If you need your own CSS class for that field, simply add it separated by a space sign. - Notices
- This is a simple note box you can use to show other admins what the field is for. This is shown only in the edit field screen in back-end. It is not output to the front-end at all.
- Google URL
- The URL to the Google API, used to show the map. By default it is set to
//maps.google.com/maps/api/js. Depending on your site protocol,httporhttpsis used automatically.
Since 22 June 2016, you need to add your site's Google API key to that URL if your site uses a Google map first after that date. Append ?key=your-api-key to the given URL address. Replace 'your-api-key' with the API key go've got from Google.
Read more about the changes made to the Google Maps APIs Standard Plan in Building for Scale: Updates to Google Maps APIs Standard Plan
Field Information

- Version
- Shows the number of times the field parameters have been edited.
- Type
- The SP-GeoMap field is of the field type 'Geo Map' in the type group 'Special'.
Entry Input Field Settings
The Gallery field has several settings for the entry input form.
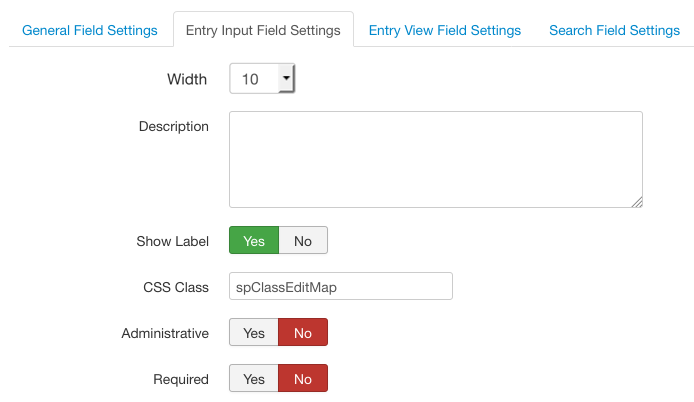
- Description
- This is thought to be used as a help text to let users know what should they put inside a field. Text entered in this field shows up in the entry form. Since the default2 template (delivered with SobiPro 1.1) the data is shown when a user clicks on the field label in the entry form.
With SobiPro 1.2+ and its default (V3 and V4) templates, you can choose within the Template Settings how the text should be shown. The possibilities are 'below', 'above', 'on the right side' and 'popup', where 'popup' is the way the default template V2 uses. Otherwise the text is shown below, above or on the right side of the input area. - Show Label
- This setting allows to switch off the label in the entry form.
- CSS Class
- Allows to add a CSS class that will be added to the output in the entry form only.
It is pre-set tospClassEditMap. It is not wise to change or remove it as it could be used by one of the SobiPro templates to style the output of that field. If you need your own CSS class for that field, simply add it separated by a space sign. - Administrative
- Determine if the content of the field will be set by an administrator only (Yes). The field isn't shown to normal users in that case.
Please note, administrative fields which are set to 'required', are not required for front-end edits!
- Required
- Let you choose whether to make the field required when a user adds or edit an entry. If a field is set to required, it has to be filled in, otherwise the form cannot be send.
- Determine Location
- If set to Yes, a 'Locate Me' button is shown in the entry form. If the user clicks this button, the browser tries to locate his position. Since this can compromise privacy, the position is not available unless the user approves it. Be aware that each browser has its own policies and methods for requesting this permission. The accuracy depends on the used device and is most accurate for devices with GPS, like mobile phones. Without GPS information an IP-based geo-location is used.

Note: In most newer browsers, the geo-location will only work on secure contexts such as HTTPS (SSL). If the site is hosted on an non-secure origin (such as HTTP) the requests to get the users location will no longer function.
Read more about that in Geolocation API Removed from Unsecured Origins in Chrome 50. - Start Point Coordinates
- By default the map positions at latitude 0 and longitude 0 (0,0), which is somewhere in the sea, so the map shows probably blue. If you want to have the map pre-set to a given location (perhaps the middle of your country), use this setting for it by entering the graphical coordinates of that location, separated by comma (e.g
48.85633492847869,2.3243133947377146). You can get the coordinates from Google directly or use the entry form of your SobiPro directory for that. To do so, simply open the entry form and type in the address of the location. The map positions to it and its coordinates are shown in the longitude and latitude fields. Place your cursor into these fields and copy the content to your computers clipboard and then to this setting.
Geo Map Specific Settings

- Width
- The width of the GeoMap field's input area in the entry form is set in Bootstrap column widths. This needs the proper code for showing the field in the entry form as it is since the default V3 template of SobiPro 1.2. You can select a value from 1 to 10, which results in either
<div class="col-sm-x>...</div>for Bootstrap 3 or<div class="spanx>...</div>for Bootstrap 2, wherexrepresents your selected width.
The map is always shown with a width of 100% within this area. - Height
- Set the height of the map in the entry form in pixels.
- Zoom Level
- The initial zoom level for the map in the entry form. The range is 1 to 21, where 1 is fully zoomed out and 21 is fully zoomed in.
- Available Views
- The available views of the map. You can choose only one or both. If the 'Map Type' control is enabled, this will show the chosen view selection buttons on the top left of the map.
You need to choose at least one view, otherwise the map functionality is switched off and no map is shown. - Default View
- The initial view of the map shown in the entry form. It has to be the (or one of the) available view(s) as selected above.
- Map Options
- This setting specifies the options shown on the map in entry form.
- Zoom Control - The Zoom control displays "+" and "-" buttons for changing the zoom level of the map. This control appears in the bottom right corner of the map.
- Map Type Control - The Map Type control displays a horizontal button bar, allowing the user to choose from the available map views (roadmap, satellite) as set above.
- Scale Control - The Scale control displays a map scale element at the very bottom of the map. The user can switch between km/m and mi/ft by clicking on it.
- Street View Control - The Street View control contains a Pegman icon which can be dragged onto the map to enable Street View. This control appears near the bottom right of the map.
- Address Fields
- This setting shows the possible fields to use for the geo-location of an entry in the entry form. Ideally select street, postcode, city and country fields. If no fields are selected, the geo-locating from the given address in the entry form does not work! Hold down the shift or the cmd (Mac) / ctrl (Windows) key while selecting elements.
Edit and Payment Settings
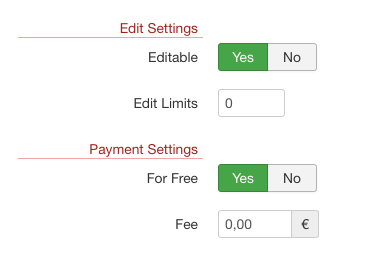
- Editable
- Sets the field to allow data to be entered only upon adding a new entry (set to No), or if the field can be changed any time the entry is edited (set to Yes).
If a field must not be edited, it isn't shown at all if an entry is edited. Nevertheless, users with super administrator rights will see this field and can edit it. - Edit Limits
- Allows to set the number of times a users can edit their entries. Set to 0 by default, means a user can edit the entry an unlimited amount of times.
Also the initial creation of the entry counts. That means, you need to set the edit limits to '2', to let the user edit their entries once.
Please note, if you change that value, the new value is valid only for newly created entries. Already created entries will keep their previous edit limits.
- For Free
- Allows to charge for adding data into that the field (set to No) or keep it free when users add or edit an entry (set to Yes).
- Fee
- The amount you charge for users to enter data into this field if 'For Free' (see above) is set to No.
Adjust the currency in System Settings -> Global Configuration -> Payments. The currency is a section-across setting.
Entry View Field Settings
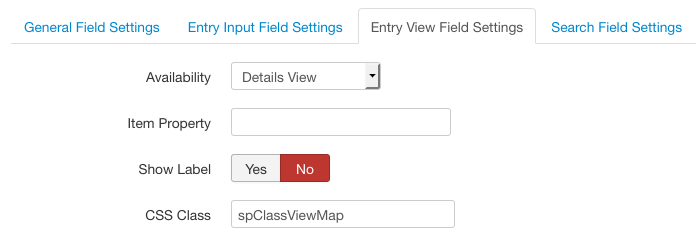
- Availability
- Whether the field will be displayed in vCard (any listing view showing a list of entries, like category, section, search results, tags...), Details View, Both or Hidden (None). Set this toHidden, if you do not want to show the content of the field at all (this can be useful for fields aimed at site managers).
Even if you call your fields separately in the template files, you should pay attention to this setting. For performance reasons, do not set it to 'Both' if you do not need the field in the listings view (vCard).
It is not recommended to use the GeoMap field in the vCard view! Loading multiple maps on one page can generate unexpected problems and slow down your site!
- Item Property
- This lets you define the itemprop attribute, used in Schema.org semantic markup. The SobiPro default templates will add it to your fields when containing data.
- Show Label
- Sets the label to be visible in the front-end views (vCard and details view).
- CSS Class
- Allows to add a CSS class that will be added to the output in the front-end views (vCard and details view) only.
It is pre-set tospClassViewMap. It is not wise to change or remove it as it could be used by one of the SobiPro templates to style the output of that field. If you need your own CSS class for that field, simply add it separated by a space sign.
Geo Map Specific Settings
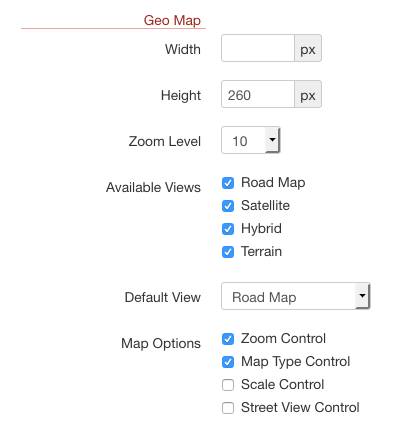
- Width
- Width of the map in the details view in pixels. If left empty, the map width is set to 100% of the container's width. Use this way for responsive layout.
- Height
- Set the height of the map in the details view in pixels. If left empty, the map height will adapt to 100% of container's height. Please note, this is not recommended, unless you've set a 'height' or 'min-height' attribute for map's container, otherwise height will be zero, and no map will be shown at all.
- Zoom Level
- The initial zoom level for the map in the details view. The range is 1 to 21, where 1 is fully zoomed out and 21 is fully zoomed in.
- Available Views
- The available views of the map. These are Road Map, Satellite, Hybrid and Terrain. If the Map Type Control is enabled, this will show the chosen view selection buttons on the top left of the map.
You need to choose at least one view, otherwise no map is shown. - Default View
- The initial view of the map shown in the details view. It has to be the (or one of the) available view(s) as selected above.
- Map Options
- This setting specifies the options shown on the map in entry form.
- Zoom Control - The Zoom control displays "+" and "-" buttons for changing the zoom level of the map. This control appears by default in the bottom right corner of the map.
- Map Type Control - The Map Type control displays a horizontal button bar, allowing the user to choose from the available map views (roadmap, satellite) as set above.
- Scale Control - The Scale control displays a map scale element at the very bottom of the map. The user can switch between km/m and mi/ft by clicking on it.
- Street View Control - The Street View control contains a Pegman icon which can be dragged onto the map to enable Street View. This control appears near the bottom right of the map.
Meta Data Settings

- Add Coordinates to Meta Data
- Adds the coordinates of an entry to the meta data of the details view. The following meta data are generated:
<meta name="ICBM" content="48.85633492847869,2.3243133947377146"/>(see also ICBM address at Wikipedia ) and<meta name="geo.position" content="48.85633492847869;2.3243133947377146"/>(see also Geotagging at Wikipedia )
Search Field Settings
The SP-GeoMap Field (not the Basic SP-GeoMap Field) provides a proximity search. A proximity search lists all resulting search entries by proximity of a given location. This means, if the user enters a location in the field's specific search map area, the resulting entries from the other search parameters were sorted by distance from that location. No need to add additionally a radius.
The following description is for the full version of the SP-GeoMap Field only. It does not apply to the Basic SP-GeoMap Field!
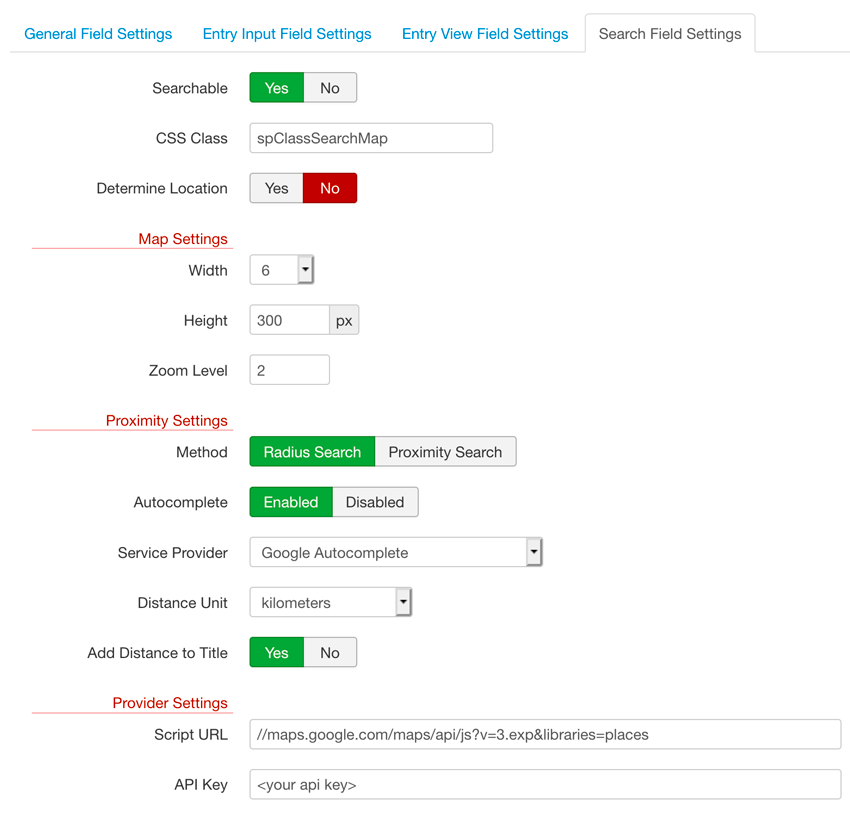
- Searchable
- If set to No, the proximity search is switched off and no map is shown in the search view.
- CSS Class
- Allows to add a CSS class that will be added to the output in the search view only.
It is pre-set tospClassSearchMap. It is not wise to change or remove it as it could be used by one of the SobiPro templates to style the output of that field. If you need your own CSS class for that field, simply add it separated by a space sign.
Specific Map Settings
- Width
- The width of the GeoMap field's input area in the search form is set in Bootstrap column widths. This needs the proper code for showing the field in the entry form as it is since the default V3 template of SobiPro 1.2. You can select a value from 1 to 9, which results in either
<div class="col-sm-x>...</div>for Bootstrap 3 or<div class="spanx>...</div>for Bootstrap 2, wherexrepresents your selected width.
The map is always shown with a width of 100% within this area. - Height
- The height of the map in the search form in pixels. If left empty, the map height will adapt to 100% of container's height. Please note that this is not recommended, unless you've set a 'height' or 'min-height' attribute for map's container, otherwise height will be zero, and no map will be shown at all.
- Zoom Level
- Set the initial zoom level for the map in the search form. The range is 1 to 21, where 1 is fully zoomed out and 21 is fully zoomed in.
Proximity Settings
- Autocomplete
- For the providers 'Google' and 'MapQuest' you need to enable the autocomplete functionality if you want to have it. 'Google Autocomplete' provides this functionality always even if not enabled in this setting. The autocomplete functionality of MapQuest starts first with the forth letter.
- Service Provider
- Choose your preferred provider for the geolocation functionality. Google, Google Autocomplete and MapQuest are available.
- Distance Unit
- Select what distance unit should be used to show the distance to found entries. You can select kilometers or miles.
- Add Distance to Title
- Select if the distance should be added to the title field of the resulting entries.
Provider Settings
- Script URL
- The URL to the selected provider's API library. By default there are following URLs which are set automatically if you select the Service Provider (see above):
- Google: //maps.googleapis.com/maps/api/js?libraries=places
- Google Autocomplete: //maps.google.com/maps/api/js?v=3.exp&signed_in=true&libraries=places
- MapQuest: https://www.mapquestapi.com/sdk/js/v7.0.s/mqa.toolkit.js
- API Key
- Allows entering your API key for the selected provider, in case needed.
Google's standard JavaScript API is free of charge. However, if you consistently generate a high amount of traffic, usage limits apply and you will need to pay for extra usage. If this is the case, you will get an API key from Google which can be entered here.
To use MapQuest as provider you need an API key also for the free plan. You will get it from the MapQuest site.
DO NOT USE the MapQuest API key that comes with the field for demonstrating purposes. Get YOUR OWN key at MapQuest's site.
How the different providers show the map
Google Autocomplete
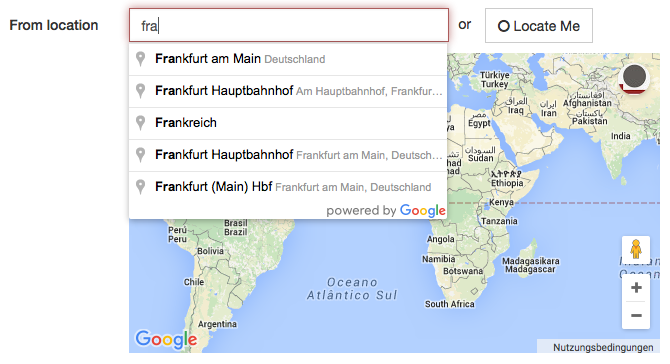
Google search with autocomplete function
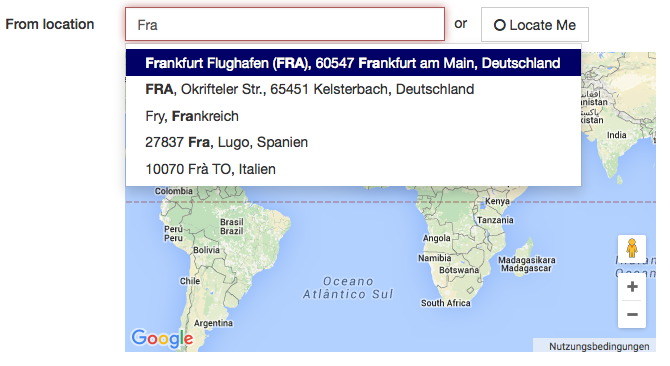
Google search without autocomplete function
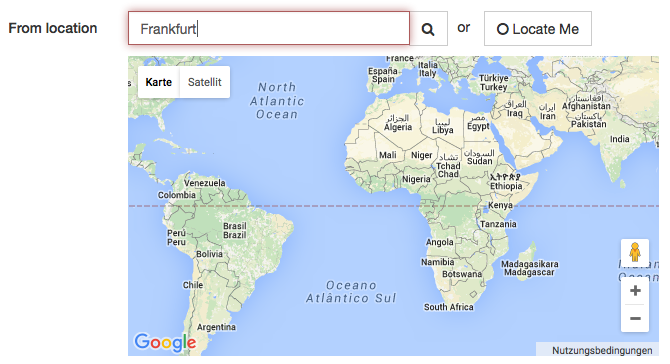
MapQuest search with autocomplete function
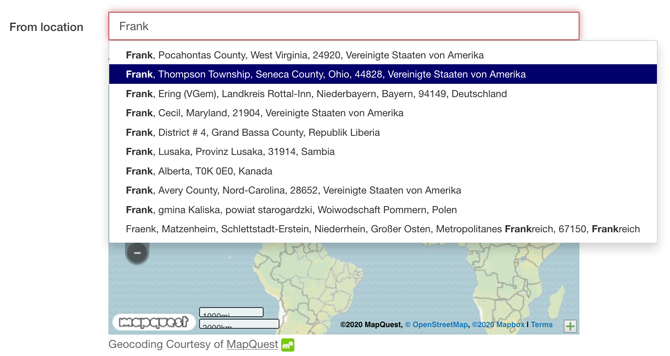
MapQuest search without autocomplete function
